Download and Install PHPMyAdmin
Ok so now that we know why we should install it, let’s get to the actual installation part.
But before we begin, let’s go download the software at: www.phpmyadmin.net/home_page/downloads.php.
The current version as I write this article is 2.11.9, so I am going to go ahead and download that to get started. Which version you use will depend on your environment; I am going to use the english.zip for this demo. Let’s get started!
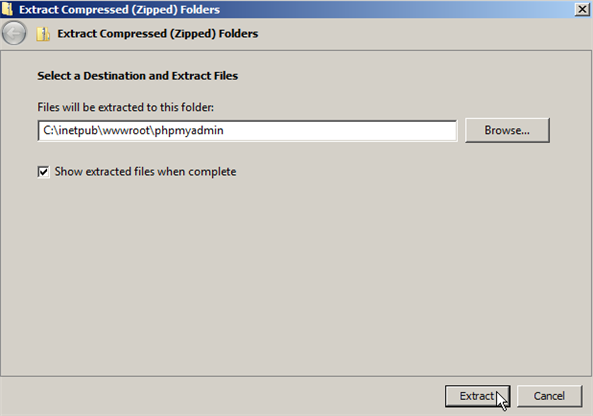
1. Extract the files from the archive to a site that is available on the web server (remember the application is web based).
For this demo I am going to use C:\inetpub\wwwroot\phpmyadmin
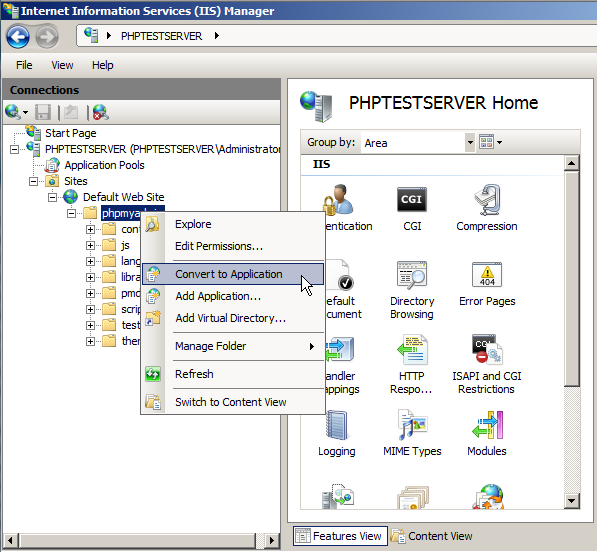
2. Now start IIS Manager and expand the default website; right click on phpmyadmin and left click on Convert to Application.
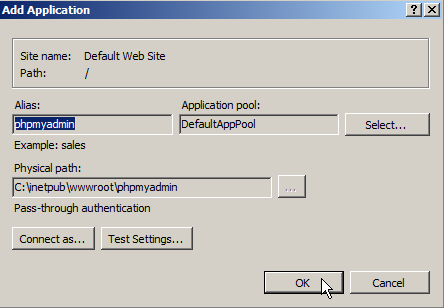
3. You can leave the default settings in place for the Add Application window and click OK.
4. Create a folder to save your PHP sessions; for our example I am going to use C:\temp\phpsessions and give full rights to the following users:
IUSR
IIS_IUSRS
Network Service
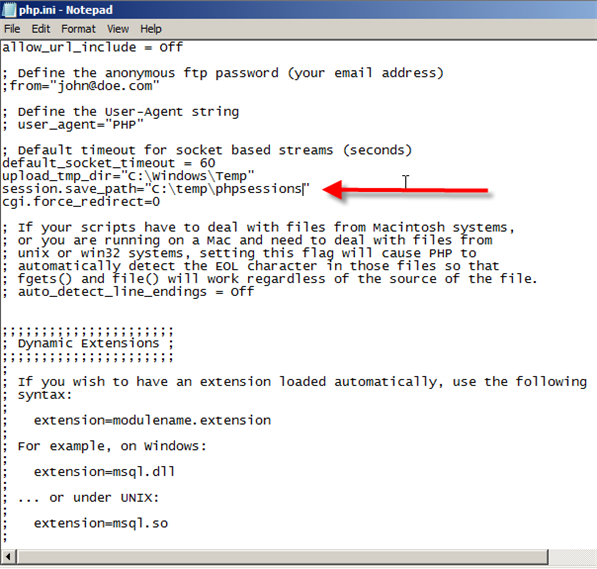
5. Now go into your php directory and find php.ini — we have to make a few changes:
Find session.save_path and set it to the same as you used in step 4 which in our case is C:\temp\phpsessions and save the file.
6. Please note that this application requires the following extensions for PHP:
MySQL
GD
MBSTRING
If you do not have these on your server already, please install them. If you are using my article to install PHP then in step 6 just add the above extensions to your installation, or if you already installed it rerun the installer msi file and modify your installation to include these extensions.
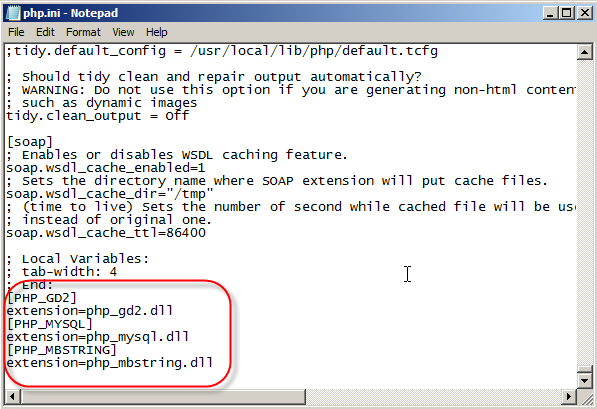
To check if they are installed do a search for extension=php_mysql in the php.ini and you should see it uncommented.
Do the same for the other extensions:
extension=php_gd2.dll
extension=php_mbstring.dll
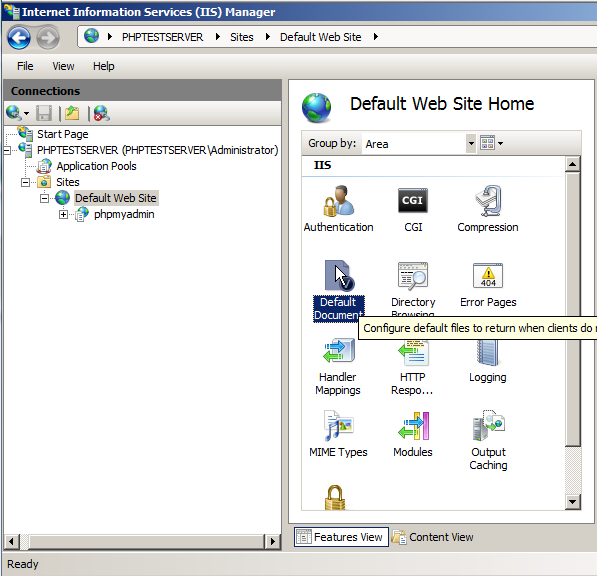
7. Go into IIS Manager, go to the default site (that is if you have been following my demo, if you have been modifying your site location or path then use that) and click on Default Document.
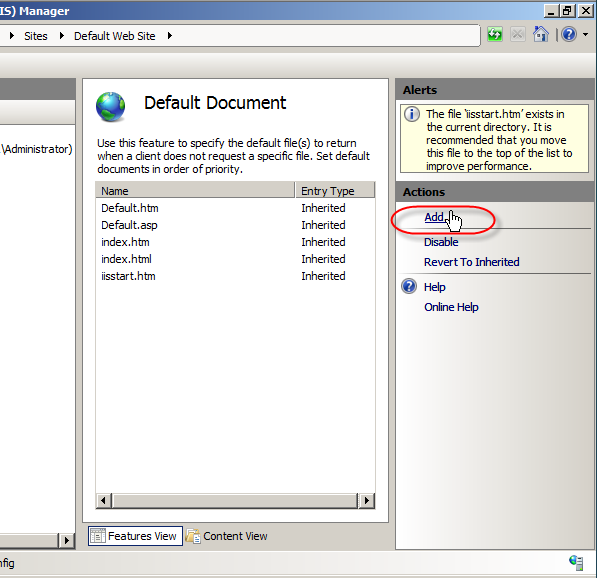
8. In the right pane click Add…
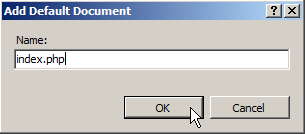
9. In the dialog box type index.php and click Ok.
10. Go to the directory that you unzipped PHPMyAdmin to and look for a file named config.sample.inc.php and open it in Wordpad. (You can use notepad but it tends to jumble everything up)
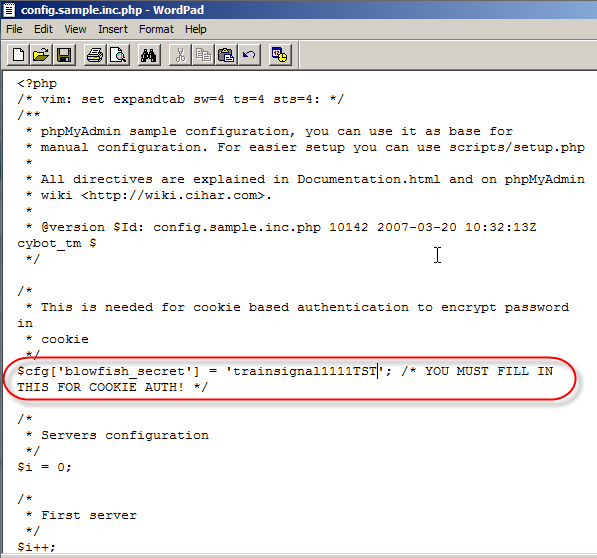
11. Now find the line $cfg[‘blowfish_secret’] = ‘’; you have to fill in this line with anything that you want but it needs to be a value.
Only up to 46 characters and it can be alphanumeric. In this case I am going to use trainsignal1111TST
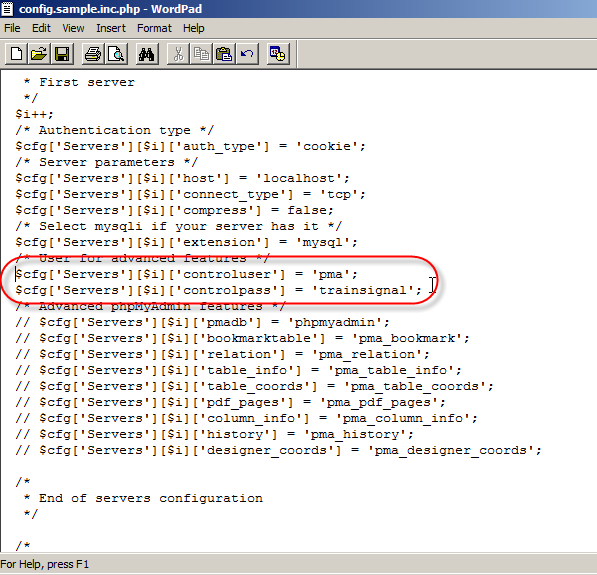
12. Go down to you see the section User for advanced features and uncomment (Remove the // from the front of the line) the two lines under that and change the pmapass to a different password, for this demo I am going to use trainsignal.
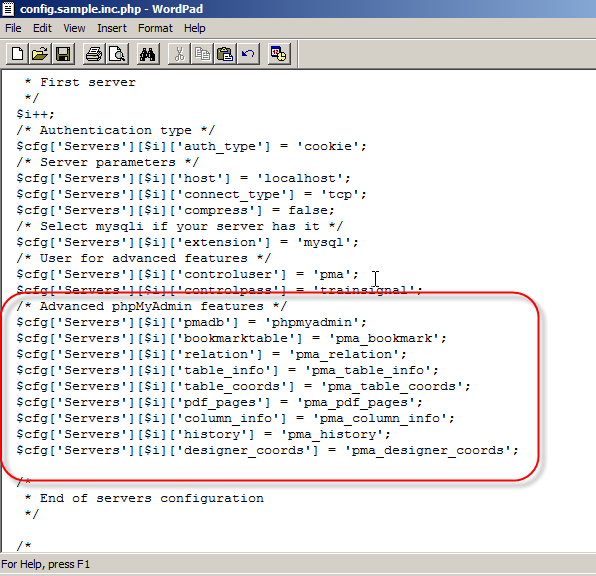
13. next, go down to the next section Advanced phpMyadmin features and uncomment all the lines under it (remove the // from the front of the line).
14. Now save this file as config.inc.php
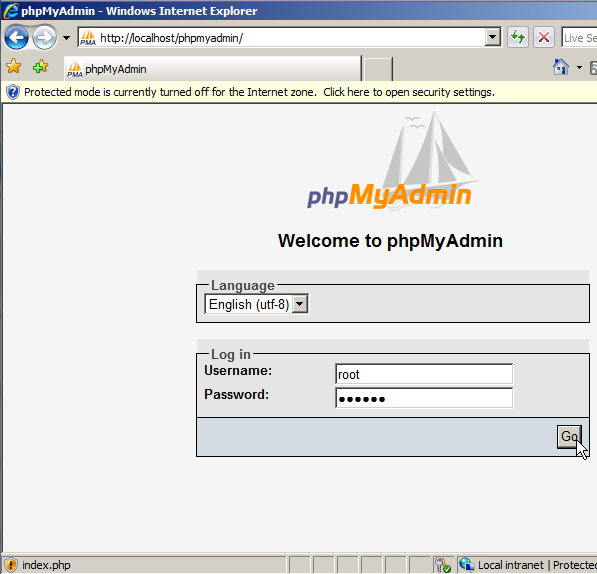
15. Point your browser to http://localhost/phpmyadmin/ (if you have been following this example; if you have used a different site/directory then point to that) and you should see a login page.
Type in the userid and password for your local MySql server, then click Go.
16. Now you are in and able to manage your MySql instance!
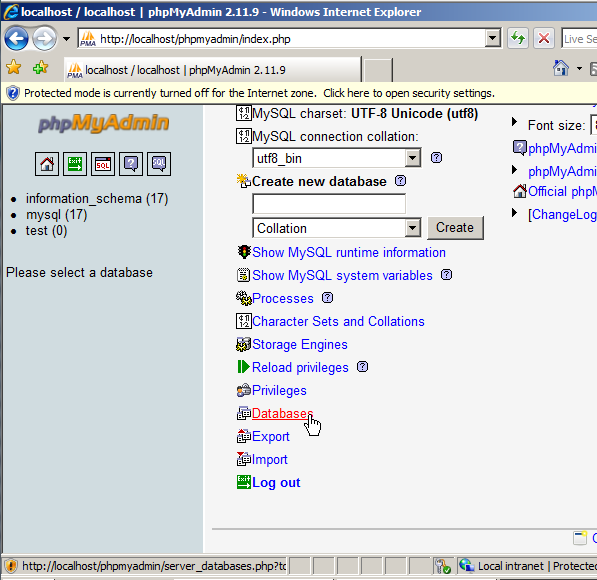
As a quick test let’s create a database by scrolling to the Database link and clicking on it
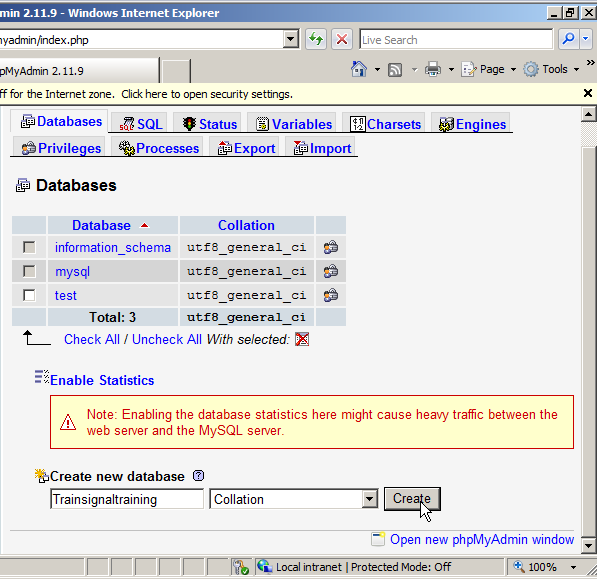
17. Type in the name of your new database, for this example I am going to use Trainsignaltraining and then click Create.
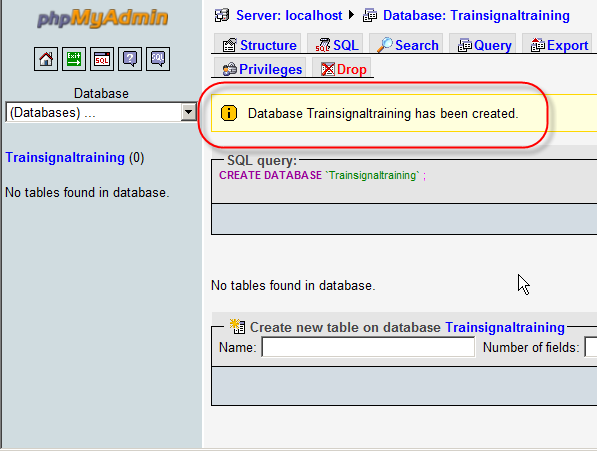
18. You will now see a page that confirms that database Trainsignaltraining has been created.
That’s all there is to it, now you can quickly and easily manage you MySql databases on IIS7 through PHPMyAdmin.
Ref URLs
http://www.iishacks.com/index.php/2008/07/03/how-to-install-php-isapi-on-windows-2008-iis7-x64/
http://www.trainsignaltraining.com/iis-7-install-fastcgi-php/2008-09-04/
http://www.trainsignaltraining.com/install-phpmyadmin-on-iis7-and-server-2008/2008-09-16/
http://www.thewebhostinghero.com/tutorials/windows2008-iis7-fastcgi-php.html